How To Remove And Reinstall The Rear Wheel On Your E-Bike
When it comes to rear hub motor e-bikes such as our Magnum models, you might find the idea of removing your rear wheel a bit intimidating. How do you navigate around the chain? The brakes? The motor cable? And while there is a lot to consider, we bet it’s a lot simpler than you think.
In this post, we’ll explain the steps for removing your rear wheel so you can confidently do it at home. That said, don't be a hero — if you’re ever in doubt or confused about your wheel or any other maintenance on your bike, just take it to your local e-bike dealer or repair shop.
Safety Warning: If you are unclear about any of the information described in your e-bike manual, this article, or the video linked at the end of this article, please make an appointment with a Magnum dealer to service your bike. Improper wheel installation can result in serious injury or death.
If you'd like, you can skip ahead to the video.
When Should I Remove My Rear Wheel?
The main reason to remove your e-bike’s rear wheel is to replace the tube or tire. You would usually do that as a result of damage, but you can also change out your e-bike tire to suit your terrain. A change in tires can help riders transition from urban and light trail riding to adventurous or rugged off-roading. Make sure to only use quality tires designed for your e-bike’s wheel size and model!
To change your tire, simply:
- Turn your battery power off or remove the battery entirely from your e-bike
- Disconnect the motor cable quick connector
- Change the flat tire as you would a regular bike
- Reconnect the motor plug, matching up the arrows on the cable connectors
You might also find yourself needing to replace the whole wheel. This would only be due to irreparable damage, which could be caused by impact or by incorrect maintenance or installation (improper truing, bolt/nut tightening, or spoke tension).
Is The Rear Wheel Removal Process The Same On All E-Bikes?
Not a Magnum E-Bike owner? Not a problem. The steps we outline here should work for any rear hub motor e-bike, so if that describes your bike, this guide should be helpful for you. When in doubt, though, consult your manual or take your bike to your local e-bike dealer or repair shop.
Equipment You Will Need
- Bolt and axle nut sizes will vary across models. Be sure to choose the tools that match your unique bike.
- Allen wrench(es) that match your retainer bolt and derailleur guard bolt size (ex. 4mm wrench)
- Adjustable open-end wrench, or open-end wrench(es) that match your axle nut size (ex. 18mm and 19mm)
- Small cable clippers
Removing Your E-Bike’s Rear Wheel
There are many steps to removing the rear wheel, but don’t be intimidated. We’ll walk through it step by step.
Step 1: Shift Into Highest Gear
Before we get started, take your e-bike on a quick ride and shift it into your highest gear. You can be sure you’re there when you look at the freewheel: your chain will be on the smallest physical gear.
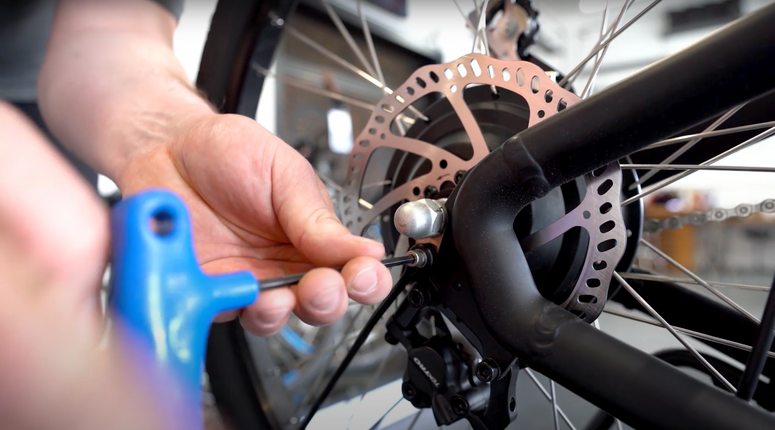
Step 2: Remove Retainer Bolt
Once you’ve shifted your e-bike into its highest gear, flip it over — or place it on a bike stand, if you have one.
Next, make sure you’re looking at the rotor side of your rear wheel, not the chain side.
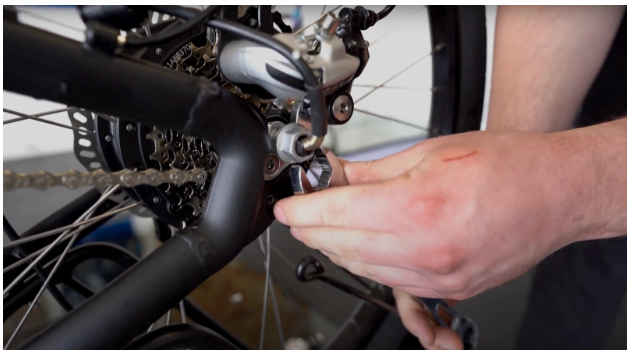
Now find your retainer bolt. Loosen that bolt with your Allen wrench. This will loosen the fender wire too, but that’s okay. Remove the bolt and set it aside.
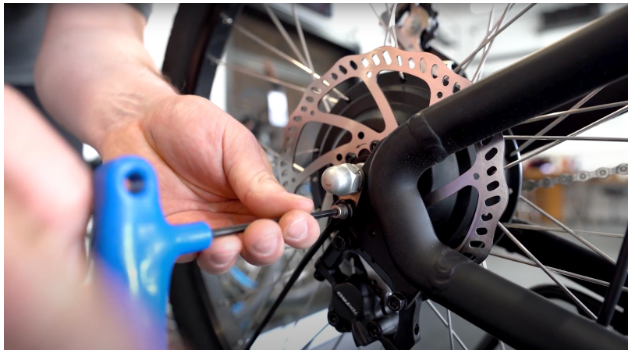 Loosen and remove your retainer bolt.
Step 3: Remove Rear Derailleur Guard
Step to the other side of your bike, so you’re now facing the chain, rear derailleur, etc. Double-check again that you’re in that high gear: the smallest physical gear.
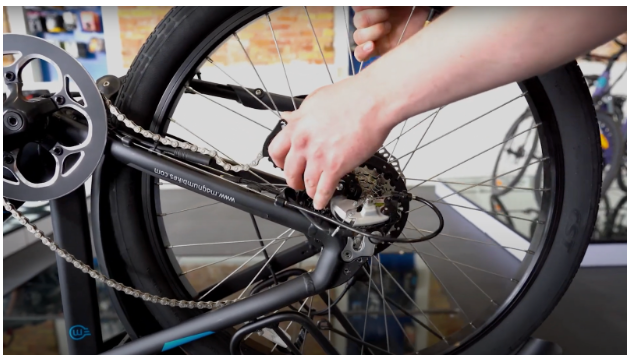
Locate the 2 bolts holding your rear derailleur onto your frame; remove both of them and set them aside. Now you can remove the rear derailleur guard; keep that with the bolts.
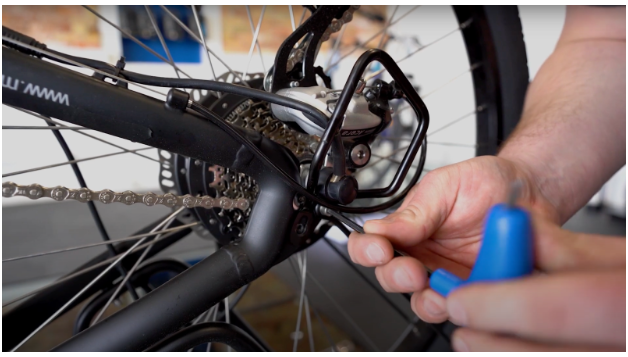 Loosen and remove the 2 bolts holding your rear derrailleur guard in place; remove the derailleur guard.
Step 4: Unplug Motor Cable
Find the motor cable, which runs from your rear wheel axle up to a plug near the rim of your wheel. Then locate the zip tie that’s holding the motor cable in place.
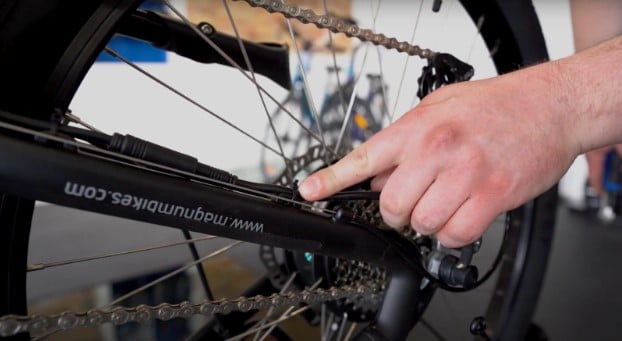 Remove the zip tie holding the motor cable in place, then unplug the motor cable.
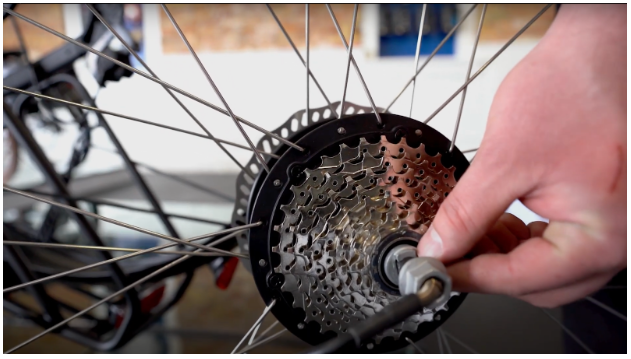
Step 5: Remove Axle Nuts
Remove the motor cable hub from the wheel axle and make sure all your cables are out of the way. Now grab your open-end wrench(es).
Start by loosening the axle nut on the side of the bike that you’re already on (the gear side). You may need to turn it quite a few times, so once it begins to loosen, speed things up by using your hands instead of the wrench. Once removed, set the axle nut aside.
 Remove the axle nuts on each side of the rear wheel.
Then, go back to the side of the bike where you started (facing your rotor) and do the same. Note that the nuts may each be different sizes, so you may need 2 different sized wrenches, or that adjustable wrench.
Step 6: Remove The Wheel
Once your axle nuts are removed, press the cage of the derailleur forward (toward the bike frame). As you’re pressing and holding the derailleur with your thumb, use your other hand to guide the wheel off of the frame. Take your time, being careful of the cables and chain.
 Press forward on the derailleur with one hand while shimmying the wheel off the frame with your other hand.
Locating And Understanding Your Anti-Turn Washers
As you prepare to reinstall your wheel, make a special note of the washers holding your freewheel and disc brake in place on either side of the wheel’s axle. Those are called anti-turn washers, and they’re the only washers that sit inside the frame when your wheel is in place. You want them to be as close to the motor as possible.
These washers are extremely important for the safe operation of your e-bike! Without proper installation and secure mechanisms, your wheel can come loose, which is extremely dangerous.
If you have any hesitation about how to properly reinstall your Magnum e-bike wheel, please consult your local Magnum dealer or repair shop.
Reinstalling Your E-Bike’s Rear Wheel
Good news — now things get a little easier! Removing your rear wheel is the hard part. Reinstalling is a bit finicky, but overall simpler. Just take your time.
As you guide your wheel into the frame, tuck your motor cable and wheel axle in through the center of your chain loop. Lift your rear derailleur. Hook the chain back onto the freewheel. On the other side, check that your rotor is where it should be as you move things into place.
Now is a good time to check on those anti-turn washers as well — and make sure they’re sitting inside the frame.
As you check the mechanisms, spin the wheel gently backward (clockwise if you’re facing the chain side; counterclockwise if you’re facing the rotor). You’ll both see and feel the wheel lock into place.
Now replace and tighten the axle nuts. Start with your hands again, and just use the open-end wrench for the final few turns.
Then replace the retainer bolt that holds the fender wire to the wheel. Next, reattach the derailleur guard and tighten those 2 bolts holding it in place.
We’re almost there! Now reconnect the motor cable by reinserting the plug; make sure the arrows on the motor cable line up. You can then install a new zip tie to secure the motor cable to the frame, and you’re done.
What About My Front Wheel?
Removing the front wheel can make it easier to transport your e-bike in a personal vehicle. You may also need to remove it if you need to replace a tube, tire, or the wheel itself.
Since your rear wheel is the one hooked up to the motor and chain, removing your front wheel is much simpler!
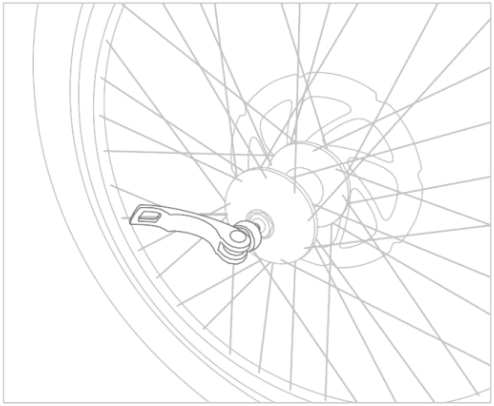
Magnum Pathfinder models as well as the Peak T5 and Peak T7 necessitate the use of an Allen wrench, but all other Magnums feature a quick release, making front-wheel removal a breeze. Just unfasten the quick-release lever and pull the wheel out!
 Front wheel with the quick release deployed; you're ready to remove the wheel.
To replace it, it’s helpful to have a partner to provide an extra set of hands. This ensures that the wheel sits properly in the fork and that the disc rotor slides up between the brake pads. If you’re by yourself, just move slowly and keep an eye on both sides of the wheel and axle as you guide the front wheel and disc rotor back in.
Top Tips To Care For Your E-Bike Wheels And Tires
With proper care, your wheels will take you far! While you should check every part of your bike regularly (see your manual for more info), here are the wheel and tire maintenance habits you need for e-bike safety.
Check tire pressure along with tire and rim condition. Check this before every ride; from debris to rough terrain, many things can change the condition of your tires or rims on any given ride.
Inspect wheel quick releases. Make sure all quick releases are tightened and secure. These hold your wheel securely to the frame, so they’re essential for a safe ride.
Check spoke tension. Broken spokes compromise the balance and integrity of your wheel, which can lead to major accidents. Grab each spoke pair (the 2 spokes that cross each other diagonally along the radius of your wheel) on each side of both wheels. If any spokes feel tighter or looser than the rest, don’t ride — take your bike in for service.
Check for wheel trueness. Grab one end of your frame and lift your e-bike off the ground. Look at your wheel from the top down and spin it. If you see any wobbling from side to side, your wheel might be out of true, making it unsafe to ride. Take your bike in for service.
Watch The Video