How To Install Fenders On An E-Bike
Fenders play a crucial role in protecting your bike and yourself from mud, debris, and water spray. In this comprehensive guide, learn everything you need to know about fenders.
From different materials and styles to installation tips and troubleshooting, we'll explore the ins and out, ensuring you have the knowledge to make the most of this essential bike accessory.
Or, you can jump ahead:
Understanding Fender Materials And Styles
Understanding Fender Materials And Styles
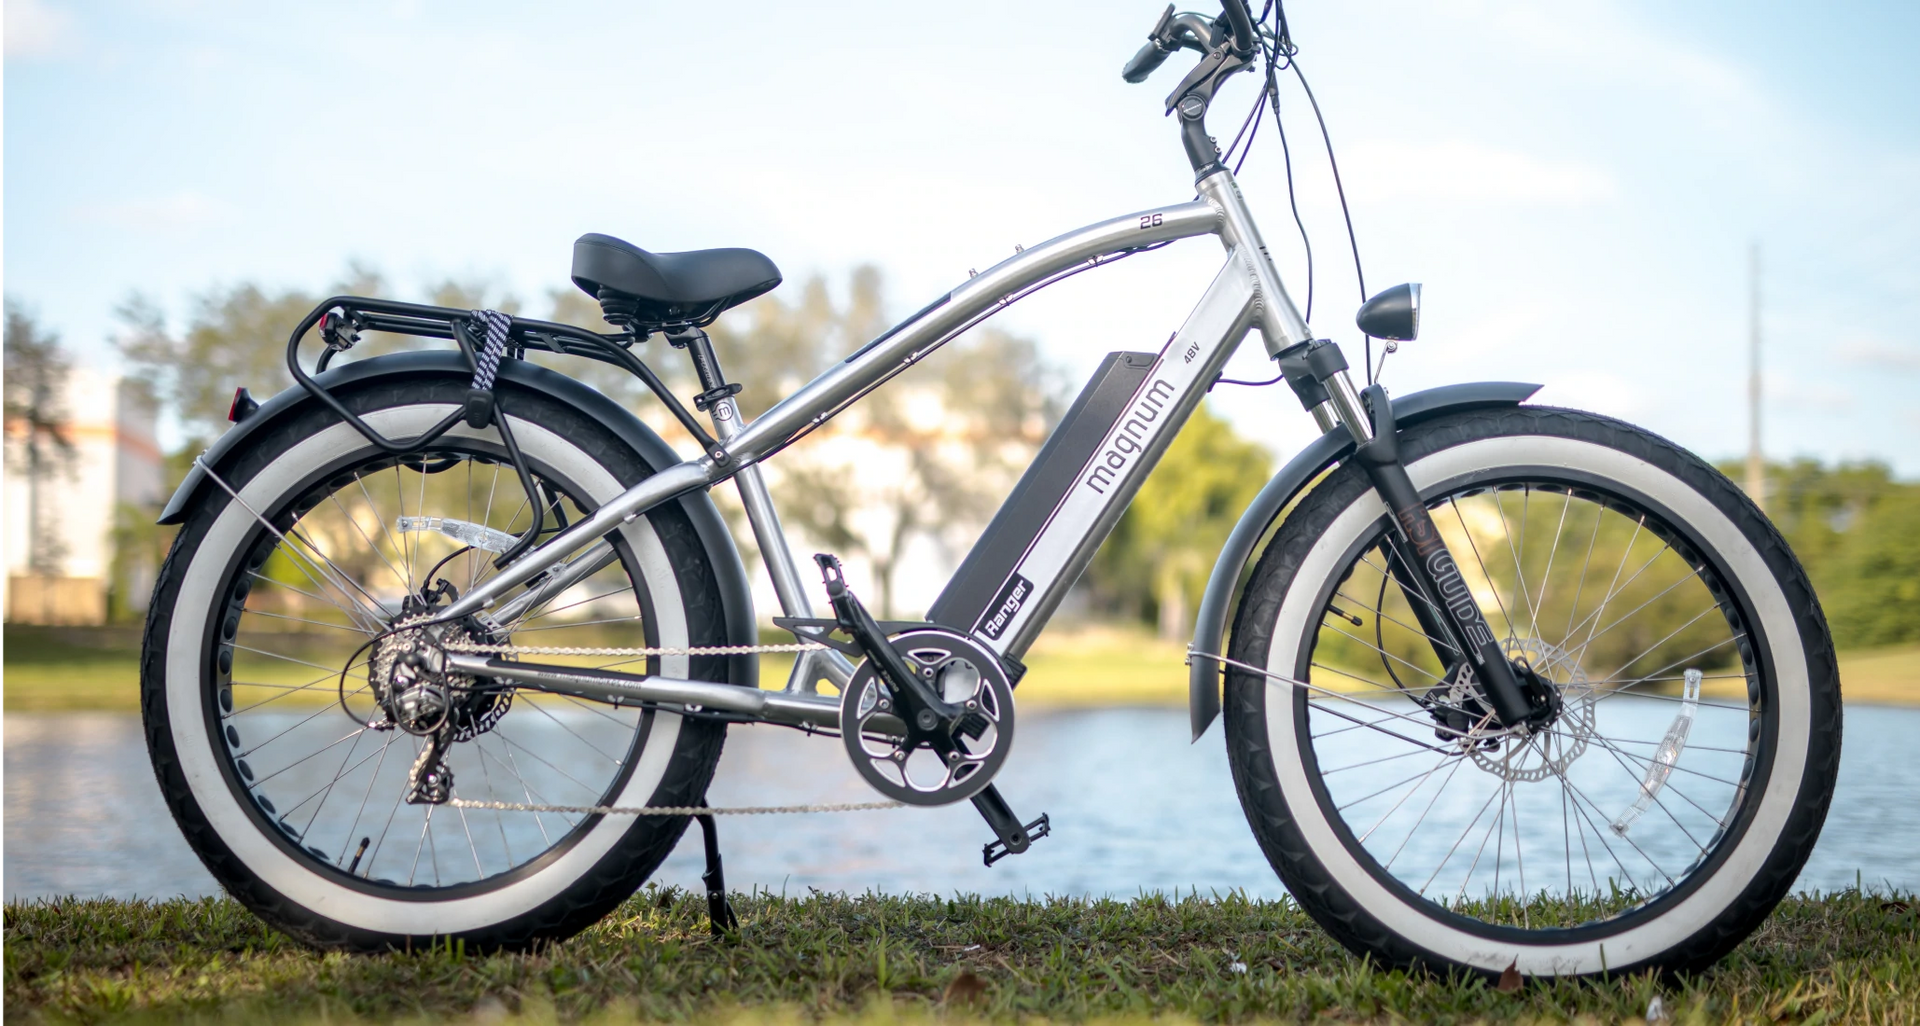
When it comes to fenders, Magnum Bikes offers a range of options to suit different bike models and rider preferences. Most of our e-bikes come standard with fenders already.
Depending on the bike, you may find fenders made of:
Metal
Polycarbonate
Plastic
The choice of material depends on the desired balance between durability and lightweight construction.
For commuter bikes, fenders tend to provide more coverage, extending further down the wheel to protect against road spray. On the other hand, mountain bike fenders are often wider to deflect mud and debris.
This thoughtful design approach ensures that Magnum Bikes' fenders are tailored to specific riding conditions and enhance the overall biking experience.
Installing fenders on your Magnum Bike is a straightforward process.
Components And Adjustments
Most of our fenders consist of 3 main components:
The fender itself
A fender holder (wire to hold the fender in place)
A fender clip (bracket that holds the holder to the fender)
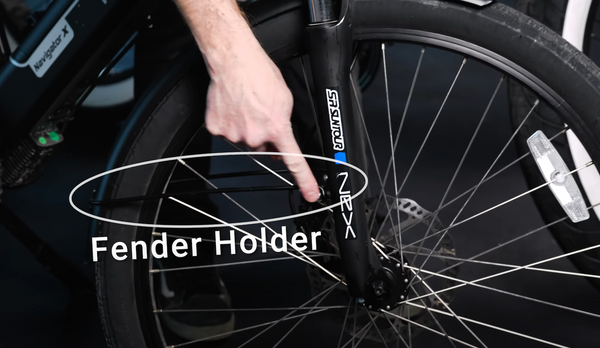
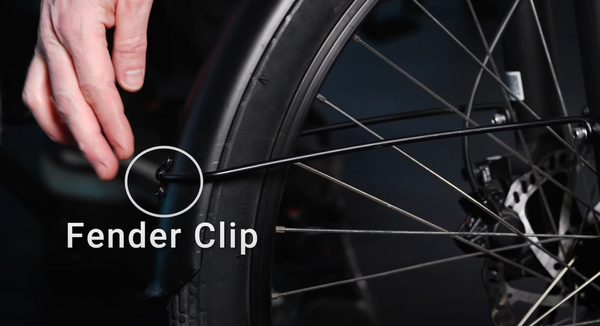
Magnum’s fenders offer adjustable features to accommodate various tire sizes and tread patterns. This flexibility allows riders to fine-tune the fender position, ensuring optimal clearance for different riding conditions.
One adjustable feature is the slot in the mount, letting you move your fender a little higher or lower above the fork to suit your preference, tire tread, etc.
Another is the fender holder, the two bars on either side of your wheel.
If your wheel begins to rub on the fender, try tweaking the fender holder a little to make more room for the tire.
However, if your tire wobbles when you spin it, this rubbing could also be a sign that you need to get your wheel trued. In that case, head to your local Magnum Bikes dealer for service.
Installation
While most of Magnum Bikes' models come with pre-installed fenders, certain mountain bikes, like the Summit, may require aftermarket fenders.
Companies like SKS offer suitable fender options that can be mounted underneath the fork and to the rear of the frame.
To install fenders on a new e-bike that isn’t fully assembled yet, check out our manuals and assembly videos.
Here’s how to install your new fenders on a pre-assembled bike:
Step 1: Mount The Fender On The Back Of The Fork
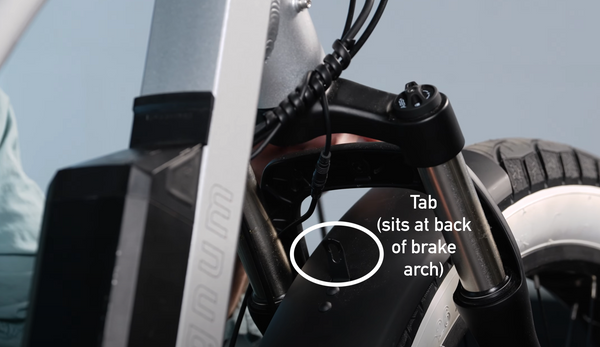
Start by locating the tab on the front fender — the tab will sit at the back of the brake arch. Position the fender behind the brake arch, ensuring a secure fit.
If your bike has a headlight, note that the fender and light will share the same mount. So use the existing bolt on your fork to attach both the fender and the light to the fork.
Some of our bikes have a long bolt with a nut, while others just have a short bolt. If the e-bike you’re working on has a nut, make sure to use a washer to prevent the nut from pulling through. Hold the bolt with a suitable Allen wrench and tighten the nut.
You can still adjust the fender's position at this stage to accommodate different tire sizes or tread patterns.
Step 2: Mount The Fender Strut To The Fork
Next, you'll need to attach the fender strut (or holder) to the fork.
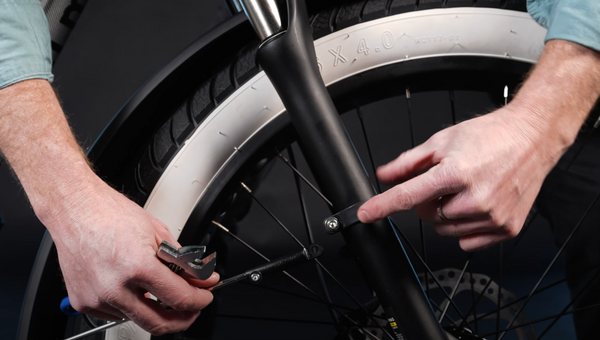
Magnum Bikes' newer models feature a sliding connector that mounts to a circular clamp on the fork. This design allows you to adjust the height of the fender without scratching the fork's finish.
Use an Allen wrench and an open or combination wrench to open the clamp. Insert the bolt through the fender strut or holder and place a washer on the back.
Now thread the bolt and tighten it securely, ensuring a snug fit — but avoid overtightening to prevent damage to the polycarbonate components. The telescoping connection on our newer models provides flexibility in positioning the fender for optimal coverage and clearance.
Step 3: Repeat The Process On The Opposite Side
Repeat the previous steps on the opposite side of the fork, taking care to maintain symmetry and proper clearance from the tire.
Start by loosening the telescoping clamp slightly to facilitate installation, and ensure that the fender sits at a consistent distance from the tire on both sides. Look out for your brake rotor as you adjust — it’s sharp!
Tighten all bolts securely and give the fender a gentle shake to confirm that it's properly mounted.
Next, check that your headlight is securely fastened and doesn't tilt or rotate during rides.
Step 4: Check For Wobbling Or Rubbing
In some cases, fenders may require slight adjustments to avoid rubbing against the tire. Your fender mount slots or steel fender holders can be manipulated to alleviate any rubbing issues.
It's important to note that tire wobbling and rubbing sounds may indicate a wheel or tire problem, rather than an issue with the fender itself.
If your tire wobbles or rubs, take it to your nearest Magnum dealer to have the wheel trued and checked for tension.
Conclusion
By now, you can effortlessly install fenders on your bike and customize them to suit your needs.
With durable construction and thoughtful design, our fenders are designed to deliver a seamless riding experience.
But if you have any questions or need assistance with your fenders or other bike-related queries, Magnum Bikes' customer support is always ready to help.
