How To Change An E-Bike Tire
When it’s time to ride, all we want to do is grab our e-bike and hit the road!
But picture yourself here:
One: You pick up your e-bike and notice something’s off… oh no! You’ve got a flat tire. Or more accurately, a flat inner tube.
Two: You and your friends are about to ride together on a rough, rocky trail! It’s time to go, but you forgot to swap your regular tires with your rugged knobby tires built for tough terrain.
If you don’t have supplies or experience changing a tire, these situations can take a long time to fix — and can really ruin your day.
On the other hand, if you’ve shopped and practiced for this very scenario, you only need a few minutes to get back on the road.
Here’s how to prepare and what to do to change your e-bike’s tube and tire in a pinch.
When Do I Need To Replace My Tubes Or Tires?
Changing Your Tube And /Or Tire
When Do I Need To Replace My Tubes Or Tires?
In general, we recommend replacing tires annually. But it depends on your tires, how often you ride, and under what conditions.
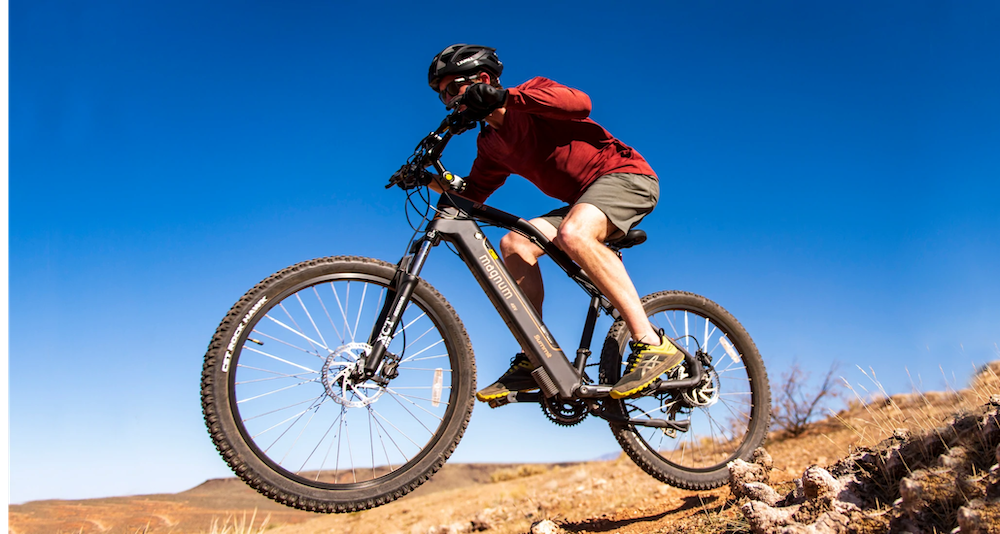
Always make sure to use the correct size of tire for your e-bike! Pictured: Low Rider 2.0
In the absence of any punctures and with proper care (or proper storage of unused tubes), your inner tubes can last much longer — potentially up to several years!
But if your tubes or tires are rated for replacement after a certain time period or a number of miles, always follow the manufacturer's instructions regarding usage, maintenance, and replacement.
Regardless, we suggest checking tire pressure and condition before every ride. That’s because any number of factors could warrant re-inflating, repairing, or replacing a tube or tire after less than a year. These include temperature changes, rough terrain, or punctures.
Supplies You’ll Need
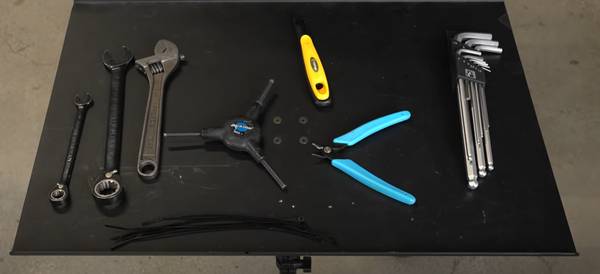
Tire pump (floor pump or micro pump)
If you aren’t sure of your tire/wheel size, check your Magnum Bikes manual. The size will be listed there!
Compatible inner tubes (for flat tires)
Side cutters, aka diagonal pliers
Allen wrenches, aka hex keys, that match your retainer bolt and derailleur guard bolt size (such as 4mm)
Open-ended wrenches that match your axle nut size, or adjustable open-ended wrenches
Optional:
Bike Stand
This makes things much easier, as you don’t have to balance your bike or hold it up while doing everything else.
If you don’t have a stand, rotate your display and controls out of the way before flipping your e-bike over, since you’ll probably rest your handlebars on the ground.
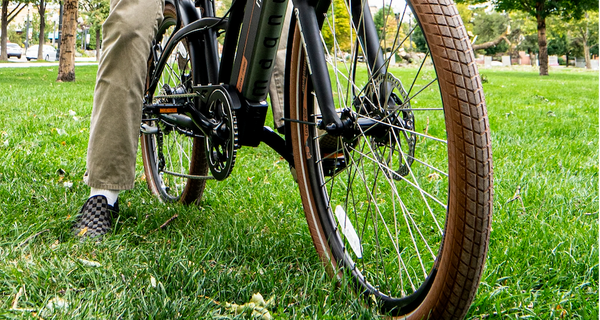
Removing Your E-Bike Wheels
Tube and tire repair and replacement on your front wheel vs. your rear wheel is basically identical — once you’ve removed the wheel from your frame, that is!
It’s usually relatively simple to remove your front wheel from the frame, but removing the rear wheel of an e-bike can be more complicated.
Let’s check it out.
Rear Wheel
Removing the rear wheel is a little tricky, but you just need some patience — and hopefully, an extra set of hands.
- Turn your battery off.
You can even remove the battery to reduce your e-bike’s weight. That’s especially helpful if you aren’t using a bike stand. - Shift down into your smallest gear.
This reduces chain tension and helps make removal less complicated. - Use side cutters to remove zip ties.
Make sure not to cut any cables as you do this! - Disconnect your motor cable quick connector.
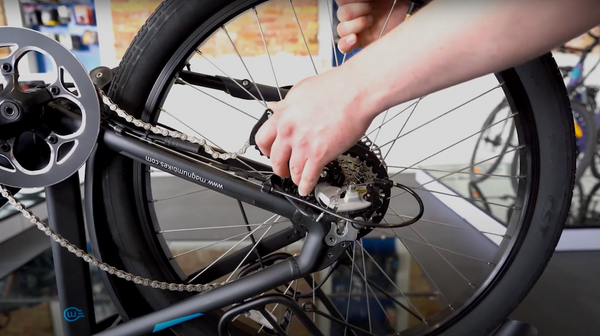
You need the motor cable out of the way to remove the wheel. - Survey your wheel hardware.
Before you remove the wheel, take note of where the hardware is located:On the outside of the frame sits the axle (closest to the wheel), then the washer, then the derailleur protector (furthest from the wheel).
- Remove bolts from your rear wheel and rear derailleur guard, as well as the axle nuts on your wheel.
Keep these organized for when it’s time to reassemble!
- Push your derailleur forward, lift your chain off the freewheel, and remove your wheel.
Watch out for all the cables and your chain as you pull the wheel away from the frame! - Survey your wheel hardware again.
After removing the wheel, you’ll see a spacer (closest to the wheel), then a no-turn washer — the edged side of the washer will be pointing down, and it should remain that way when you reinstall.
Front Wheel
The front tire is pretty easy to change on most e-bikes. Why?
To start, very few e-bikes have front-wheel motors. Most have rear hub motors or mid-drive motors instead, which is the case for all Magnum Bikes models.
Plus, your crankset, freewheel, etc. are all on the rear wheel of your bike!
So to remove your front wheel, you only need to do one thing: use the quick release!
Most Magnum Bikes models feature a simple quick-release lever for your front wheel:
Just push the lever outward (away from the wheel). If the quick-release doesn’t seem to loosen the wheel enough on its own, loosen the bolt on the other side of the wheel to release it.
Our Pathfinder, Peak, and Premium 3 series e-bikes don’t have a quick release, but front wheel removal is still simple! Just grab a wrench to loosen and remove the front axle.

See the handle pointing up from the base of the front fork on this Cruiser 2.0? That’s your quick-release lever!
Changing Your Tube And / Or Tire
Now that you’ve removed the wheel or wheels, it’s time to remove the tire — and potentially the tube, too.
- Release air from the tube.
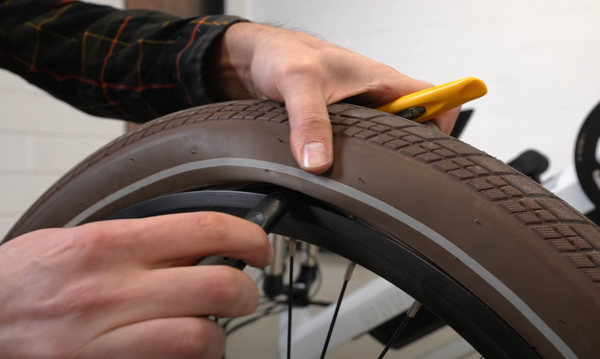
Unscrew your tire valve cap and release all excess air from the tube via the valve. You can use a small screwdriver or another tool to speed this up — just don’t press too hard! - Loosen your tire from the wheel.
Stand the wheel upright and rotate it as you massage the tire away from the rim.
Now use your tire lever set to pull the bead up and over the edge of the rim. Once loosened, slide the lever all the way around the rim.
If you’re just changing your tube, there’s no need to remove the tire all the way. Just loosen the bead on 1 side of the rim.
If you’re replacing your tire, repeat on the other side of the rim to completely remove the tire.
3. Remove your tube.
Put your fingers inside the tire and pull the valve stem out of the wheel. Once it’s free, pull the whole tube out from your tire.
4. Prepare your new tube.
Hook the valve stem of your new tube onto a floor pump and inflate it just until it holds a circular form. As you install, this helps prevent folding or catching your tube on the rim.
5. Insert your new tube.
Start by pushing the valve stem of the new tube back through the hole in the wheel. Once it’s in, pull the tube in and under the tire near that spot, then work your way around the rest of the tire.
6.Tuck the tire back into your rim.
Squeeze your tire bead back inside the rim. Once you’ve secured it in one spot, begin working your way around the rest of the rim.
If it’s tough to get the final piece to sit inside the rim, grab your tire lever. Rest the hooked side against your rim with the edge underneath your tire bead, then pull up to pop the rest of the tire into your rim.
7. Now put the wheel back onto your e-bike!
Essentially, you’ll work in reverse order of what you did to remove your wheel.
Move slowly and ensure that the wheel sits properly in the fork, that the disc rotor slides up between the brake pads, and that you clear all gear and motor parts with your rear wheel.
Check that all the hardware is in the same spot as when you took it out (see steps 5 and 8 in the Rear Wheel section for a reminder).
Tighten bolts securely with your wrench, and if applicable, press the quick release in with the palm of your hand.
When you take your hand away, you should see an imprint of the quick-release lever on your palm. That’s a good indication that you’ve used enough pressure to secure your wheel.
8. Rear wheel only: reconnect the motor cable quick connector and reinstall zip ties.
Your battery won’t be able to power your motor without plugging in the cable! And the zip ties help keep cables out of the way while you ride.
9. Inflate your tire completely.
Check your tire’s sidewall for the recommended PSI, then inflate within that range.
Checking For Trueness
So get out and see this beautiful state on your e-bike!
Once you’ve reinstalled your wheel, you need to check for trueness.
If the wheel has a wobble or doesn’t seem fully centered as it spins, schedule a service appointment with your local Magnum dealer.
SAFETY WARNING: Never attempt to true a wheel yourself. While we love the DIY spirit of performing your own bike maintenance, wheel truing requires special tools and experience.


